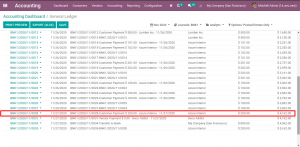
Bank Reconciliation
Key Features
1.Simplifies the default Bank Reconciliation process of Odoo 14 by Creating & Reconciling bank statements automatically.
2.Revised process is made similar to Bank Reconciliation in Tally. Payments are reconciled by just providing Date when the payment is reflected in bank statement.
3.Provides Link between Payments and respective Bank statement by automatically creating Bank statement Name with concatenating (Journal name + Date Time when reconciled)
Note: If no Time zone is mapped to respective user who does reconciliation, system will take server time zone.
4.Supports both Single & Bulk Reconciliation of Payments.
5.Reconciles both Payment’s and respective auto created Bank statement.
6.Provision to Revert / Cancel payements is provided which automatically Unreconciles journal entries of payments and respective bank statement.
The Workflow
Step 1 : Go to ‘Accounts’ module -> Under ‘Sales’ menu select ‘Payments’ -> Choose payment type as ‘Receive money’ -> Enter all required details including the newly added field ‘Bank Date’.
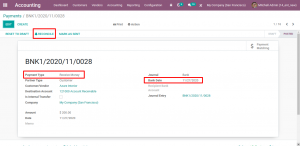
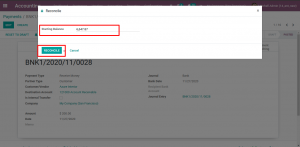
Step 2 : Filter and select only ‘Validated’ State Entries as they can only be reconciled. In Payments Screen, ‘Bank Date’ is a mandatory in order to reconcile. Click on the ‘Reconcile’ Button visible in payments form. In Wizard, specify the ‘Starting Balance’ for the Journal first time alone. Click on ‘Reconcile’ button to reconcile the entries.
NOTE : In Pop-Up Wizard, Specify the Starting balance for all the Journals only once (First time) and while processing the next transaction, kindly don’t provide the starting balance for the same journal as current balance will be auto calculated and considered.
Destination Account Type should be “Receivable” (Default Configuration), Other Account Type Should be ‘Bank and Cash’
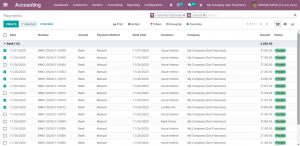
Step 3 : Group by ‘Payment Type’ & ‘Journal’ in ‘Payments’ Screen. Only ‘Validated’ State Entries can be reconciled. In ‘Payments’ Screen, ‘Bank Date’ is mandatory in order to reconcile. Select multiple Payment(s) from list view –> Click ‘Action’ menu –> Click ‘Reconcile’ Button. In Wizard, specify the ‘Starting Balance’ for the Journal first time alone. Click on Reconcile button to reconcile the entries.
(first time only, as it will be calulated and updated automatically there after)
Step 4 : Automatically created Bank statement can be viewed in respective Journal’s bank statement master.
Note: Bank statement Name auto created with concatenating (Journal name + Date Time when reconciled)
Respective Payment Name(sequence) is passed as Reference in Bank statement line.
‘Memo’ field from a payment form is passed in ‘Label’ field in respective auto created Bank statement’s line item.
NOTE: The Journal Type should be ‘Bank’, Only then It will be displayed in Bank Statements Menu
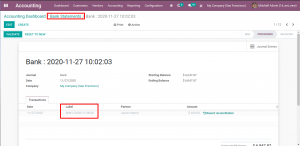
Step 5 : In order to Cancel or Revert confirmed Bank reconcilition(s) -> Go to respective Payment and click on ‘Reset to Draft’ button –> Click on ‘Cancel’ button
Note: Bank statement(s) are UN-reconciled automatically when “Reset to Draft” button is clicked.
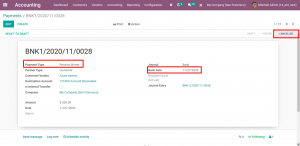
Step 6 : Once a Payment is cancelled -> Respective Journal items are first Unreconciled and then automatically removed from bank statement’s line item.
Note: When a ‘Payment’ entry is cancelled by clicking on ‘Reset to Draft’ button followed by ‘Cancel’ button -> In case it is subject to Reconciliation again, a new Bank statement will be created.
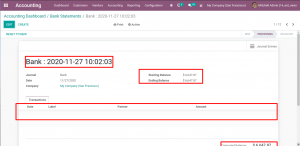
Step 7 : Go to ‘Accounts’ module -> Under ‘Purchase’ menu select ‘Payments’ -> Choose payment type as ‘Send money’ -> Enter all required details including the newly added field ‘Bank Date’
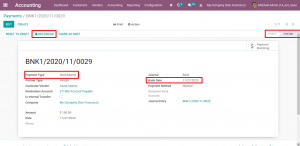
Step 8 : Filter and select only ‘Validated’ State Entries as they can only be reconciled. In Payments Screen, ‘Bank Date’ is a mandatory in order to reconcile. Click on the ‘Reconcile’ Button visible in payments form. In Wizard, specify the ‘Starting Balance’ for the Journal first time alone. Click on ‘Reconcile’ button to reconcile the entries.
NOTE : In Pop-Up Wizard, Specify the Starting balance for all the Journals only once (First time) and while processing the next transaction, kindly don’t provide the starting balance for the same journal as current balance will be auto calculated and considered.
Destination Account Type should be “Payable” (Default Configuration), Other Account Type Should be ‘Bank and Cash’.
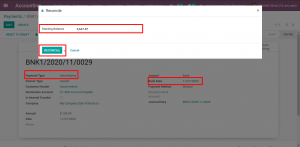
Step 9 : Group by ‘Payment Type’ & ‘Journal’ in ‘Payments’ Screen. Only ‘Validated’ State Entries can be reconciled. In ‘Payments’ Screen, ‘Bank Date’ is mandatory in order to reconcile. Select multiple Payment(s) from list view –> Click ‘Action’ menu –> Click ‘Reconcile’ Button. In Wizard, specify the ‘Starting Balance’ for the Journal first time alone. Click on Reconcile button to reconcile the entries.
(first time only, as it will be calulated and updated automatically there after.)
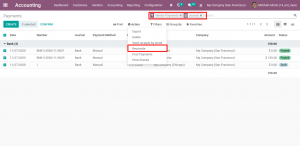
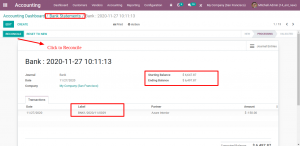
Step 10 : Automatically created Bank statement can be viewed in respective Journal’s bank statement master.
Note:
Bank statement Name auto created with concatenating (Journal name + Date Time when reconciled)
Respective Payment Name(sequence) is passed as Reference in Bank statement line.
‘Memo’ field from a payment form is passed in ‘Label’ field in respective auto created Bank statement’s line item.
The Journal Type should be ‘Bank’, Only then It will be displayed in Bank Statements Menu.
Step 11 : In order to Cancel or Revert confirmed Bank reconcilition(s) -> Go to respective Payment and click on ‘Reset to Draft’ button –> Click on ‘Cancel’ button
Note: Bank statement(s) are UN-reconciled automatically when “Reset to Draft” button is clicked.
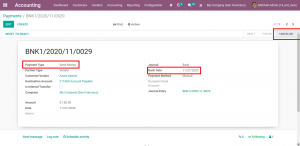
Step 12 : Once a Payment is cancelled -> respective Journal items are first Unreconciled and then automatically removed from bank statement’s line item.
Note: When a ‘Payment’ entry is cancelled by clicking on ‘Reset to Draft’ button followed by ‘Cancel’ button -> In case it is subject to Reconciliation again, a new Bank statement will be created.
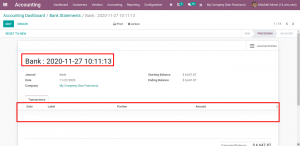
Step 13 : Go to ‘Accounts’ module -> Under ‘Sales / Purchase’ menu select ‘Payments’ -> Choose payment type as ‘Internal Transfer’ -> Enter all required details including the newly added field ‘Bank Date’
Note: Here Source and Destination Journal has to be mapped.
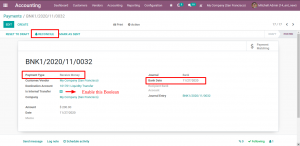
Step 14 : Filter and select only ‘Validated’ State Entries as they can only be reconciled. In Payments Screen, ‘Bank Date’ is a mandatory in order to reconcile. Click on the ‘Reconcile’ Button visible in payments form. In Wizard, specify the ‘Starting Balance’ for the Journal first time alone. Click on ‘Reconcile’ button to reconcile the entries.
NOTE : In Pop-Up Wizard, Specify the Starting balance for all the Journals only once (First time) and while processing the next transaction, kindly don’t provide the starting balance for the same journal as current balance will be auto calculated and considered.
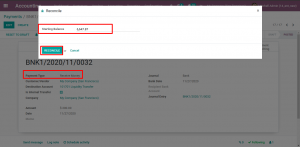
Step 15 : Group by ‘Payment Type’ & ‘Journal’ in ‘Payments’ Screen. Only ‘Validated’ State Entries can be reconciled. In ‘Payments’ Screen, ‘Bank Date’ is mandatory in order to reconcile. Select multiple Payment(s) from list view –> Click ‘Action’ menu –> Click ‘Reconcile’ Button. In Wizard, specify the ‘Starting Balance’ for the Journal first time alone. Click on Reconcile button to reconcile the entries.
(first time only, as it will be calulated and updated automatically there after.)
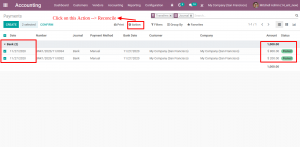
Step 16 : In Internal Transfers two bank statements are automatically created and can be viewed in respective Journal(s) bank statement master.
Amount is debited from the Source Journal & credited in Destination Journal
Note: Bank statement Name auto created with concatenating (Journal name + Date Time when reconciled)
Respective Payment Name(sequence) is passed as Reference in Bank statement line.
‘Memo’ field from a payment form is passed in ‘Label’ field in respective auto created Bank statement’s line item.
The Journal Type should be ‘Bank’, Only then It will be displayed in Bank Statements Menu
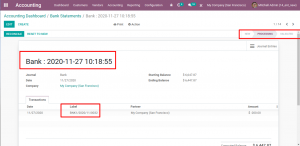
Step 17 : In order to Cancel or Revert confirmed Bank reconcilition(s) -> Go to respective Payment and click on ‘Reset to Draft’ button –> Click on ‘Cancel’ button
Note: Bank statement(s) are UN-reconciled automatically when “Reset to Draft” button is clicked.
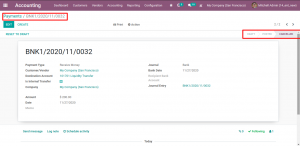
Step 18 : Go to respective Payment and click on ‘Reset to Draft’ button followed by ‘Cancel’ button
Note: When a ‘Payment’ entry is cancelled by clicking on ‘Reset to Draft’ button followed by ‘Cancel’ button -> In case it is subject to Reconciliation again, a new Bank statement will be created.
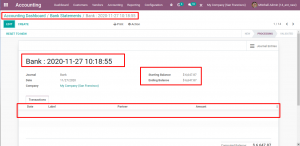
Step 19 : Go to ‘Accounts’ module -> Under respective Journal’s dashboard menu-> select ‘Reconciliation Report’.
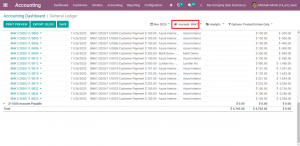
Step 20 : Go to ‘Accounts’ module -> Under respective Journal’s dashboard menu-> select ‘Reconciliation Report’.
